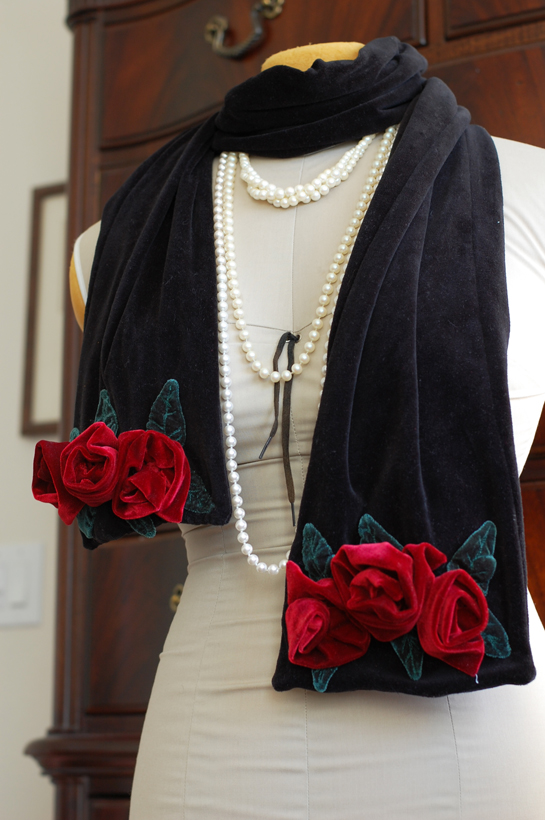
I made this scarf from velvet and velveteen scraps. However, you can make it from jersey knit (and/or old t-shirts), wool (and felted wool sweaters), or whatever fabrics you have on hand. Vary the colors to suit your own tastes.
Materials (all are washable):
Black velveteen or velvet (two pieces 8″ by 72″)
Red velvet (I used the sleeves from a garage sale shirt that I bought for $1; you can also buy 1/8 yard)
Green velvet (I used less than 1/8 yard)
Black thread
Green thread to match velvet
Red thread
Leaf drawing
I found it easier to use a slightly longer stitch on the velvet than I do for thinner fabrics. I set my machine to a 2.8 stitch length.
To make the scarf:
Cut two pieces of black velveteen, 8 ” by 72″. Place right sides together and pin. Starting at the end of one long side, sew the two long sides and one short side together, using a 1/4″ seam, leaving the other short side open for turning. Turn right side out, making certain to turn the corner points out (a dull pencil works well for this).
Turn under seam allowance on the open side and pin scarf closed.
Thread a hand-sewing needle with black thread. Use a running stitch to sew scarf closed (as close as possible to the edge).

To make the leaves:
Use template to cut out 24 leaves. I found it easier to cut a few leaves with the template, and then to use a leaf as the template for the other leaves. I cut all of the leaves in the same direction so that the nap on the velvet went the same way.
If you’ve purchased an 1/8 yard of a 56″ wide fabric to make the leaves, you will have extra enough to make many more leaves or to use for another project.
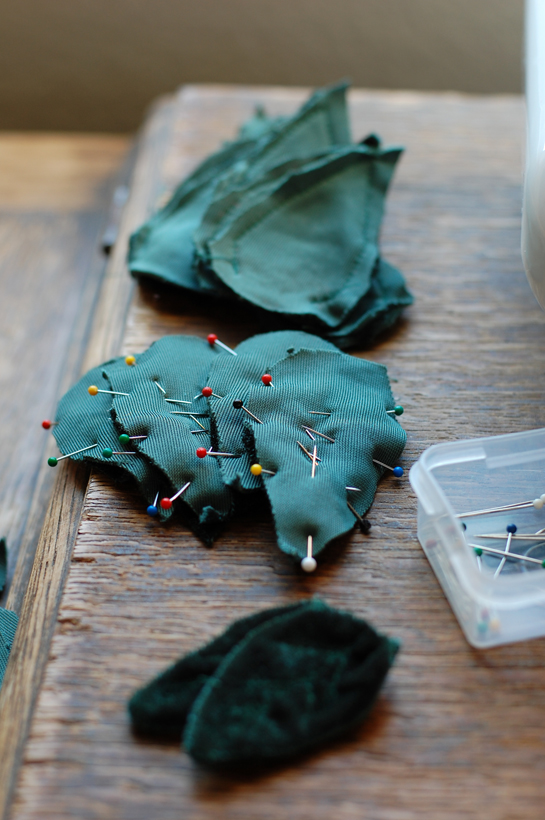
Place leaves right sides together and pin. Use a 1/4″ seam and stitch leaves together, leaving enough on the large end of the leaf open for turning.
Turn leaves right side out, using a pencil or other tool to get the points of the leaves turned all the way. Turn under seam allowance on the open end. Pin leaves closed. Use matching thread to sew leaves closed by hand with a running stitch, as close as possible to the open end.
Thread machine with green thread on top and in the bobbin with green thread. I used a green that was as close as possible to the color of the fabric. You can use a different shade of green for contrast if you like.
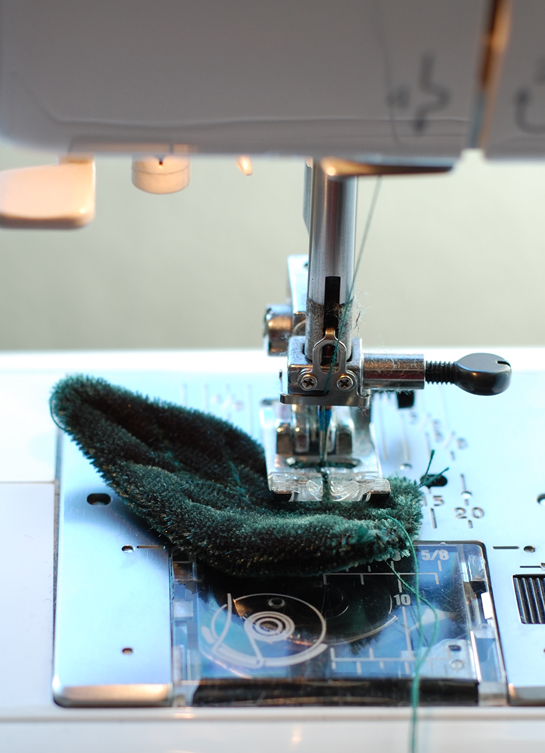
Starting at the widest part of the leaves, sew a straight line to the tip of the leaves. When you reach the tip, leave the needle down in the fabric, lift up the presser foot, and turn leaf around. Stitch back along the same line that you first stitched, about 1/2″.
From here you will make the veins in the leaves. Turn the leaf at an angle and stitch backwards to form a vein on one side. Then stitch forwards to restitch over the same line.
With the needle down, turn the leaf straight again and stitch forwards over the first main vein for 2-3 stitches.
With the needle down, turn the leaf at an angle to stitch the vein on the opposite side of the first, using the same method as you did for the opposite side.
Repeat this process several times to make the rest of the veins on each leaf.
When you reach the end of the vein, sew back a few stitches again to keep the stitches from coming undone, and trim threads.
To make the roses:
I made two different sizes of roses, since I repurposed sleeves to make the roses. I was able to make 3 roses from each sleeve of a child’s shirt. I cut the sleeves off of the shirt, and then cut them along the seam line to lay the fabric flat. I then upicked the hem on the end of the sleeve to get more than an inch in fabric, and then cut the sleeves into three pieces.
The center section of the sleeve provided a longer section that made for a bigger rose. I chose to use the bigger rose in the center of each side of the scarf. You can also cut them all the same size if you prefer.
Cut your pieces of red velvet:
4 roses: 3 1/2″ by 12″
2 roses: 3 1/2″ by 14″
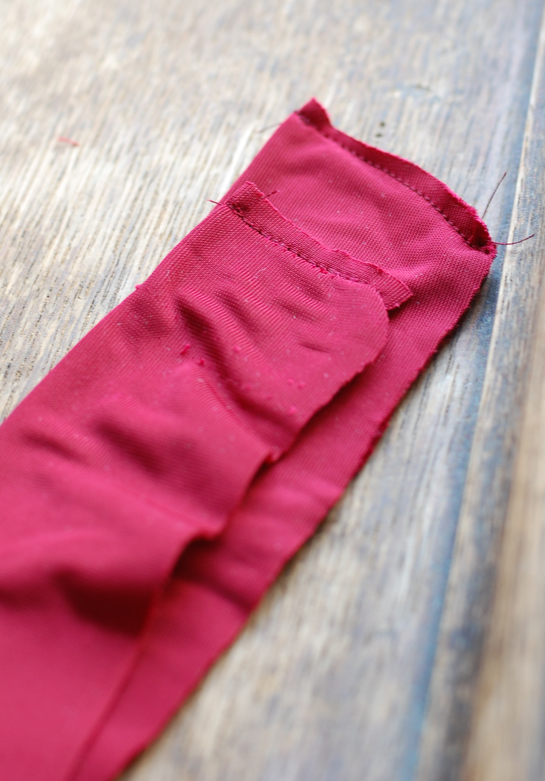
Fold each piece of fabric in half length-wise, right sides together. Pin fabric together on just the short ends. Using a 1/4 inch seam, sew together both of the short ends.
Trim threads and turn roses right-side out. With wrong sides together, pin fabric the length of roses. Using a long stitch (I set my machine to a 5), sew roses together, leaving plenty of thread on each side for gathering.
Pull one thread of each rose taut to gather the threads.
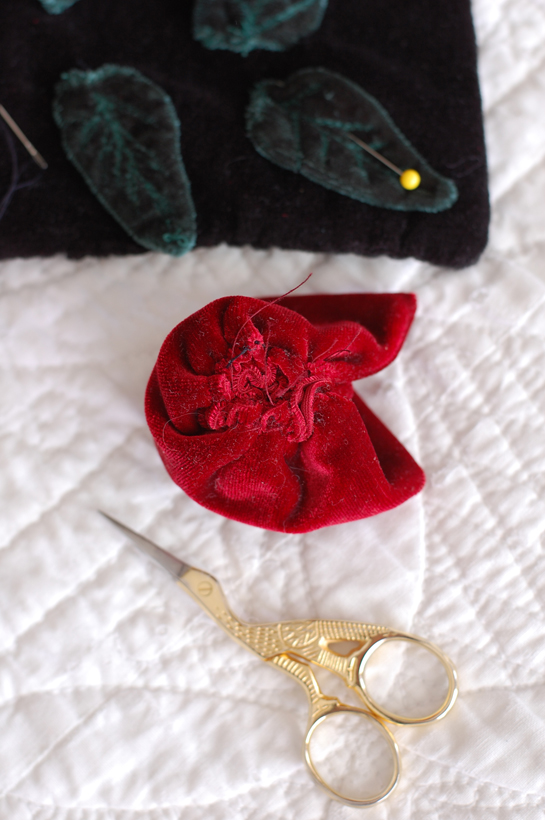
Roll roses up lengthwise to form roses.
Using a hand sewing needle and red thread, sew through all of the layers across the bottom, making sure to go through all of the layers in both directions.
Putting it all together:
Lay out the leaves and roses where you want them to be on the scarf. Then remove the roses and pin the leaves in place. I put two leaves by each rose (one above and one below). I crowded the roses a bit so that they wouldn’t have empty space in between, and I put the larger roses in the middle on each side.
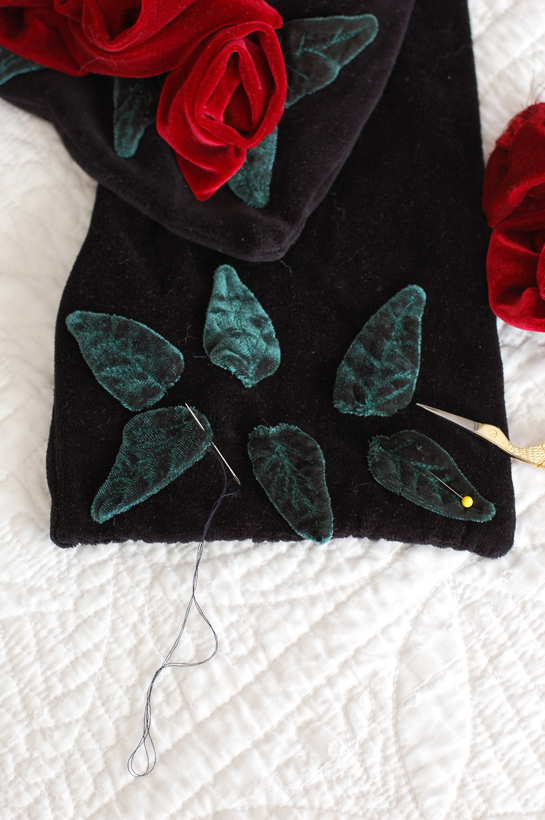
Sew the leaves on first by hand, using black thread. I sewed them on all the way around, using a tiny whip stitch. Just catch the leaves at the underneath edge so that the stitching won’t show. If you only catch the top layer of velvet, your stitching won’t show on the other side, since you won’t be going through both layers of black velvet.
Sew the roses on by hand at the base of the roses in the same manner. First sew down the middle of the rose. Then catch part of the petals to stitch down in a few places as well.
Enjoy!
Notes: This scarf can be made from new or repurposed materials. A velvet skirt from the thrift store would be great for the body of the scarf. You may need to piece a couple of pieces together to get the length correct; just make certain that the nap (pile) of the velvet runs the same direction when you sew it together so that the seam becomes almost invisible.
Most velvets say they are not machine washable. However, if the velvet is poleyster and spandex, it can usually be safely washed on cold, and hung to dry. If it is of other materials, it may develop wrinkles that are permanent–but not neccesarily bad looking; your velvet will them just have the look of crushed velvet, which may make your flowers look even more like real ones!
Washing instructions: Wash on cold, hang to dry.