

Both Elsa and Ivory have recently asked me for a crown to wear when they dress up as princesses. We’ve had a good number of dress-up crowns in our house, but none have survived the first three daughters to pass down to daughters four and five. Most crowns are plastic, and all of the little girls at my house leave them on the floor, where someone ends up stepping on them.
I’ve made a fabric crown in the past for Cyrus (this one) but I wanted a more dainty look for a 4-year-old and a 2-year-old. I attempted my own design with fabric in the past, and that crown never did get finished, as turning it right-side out was too difficult. This time, I decided to use felt, so that I could avoid the need to turn it inside out, and so that I could finish the project more quickly.
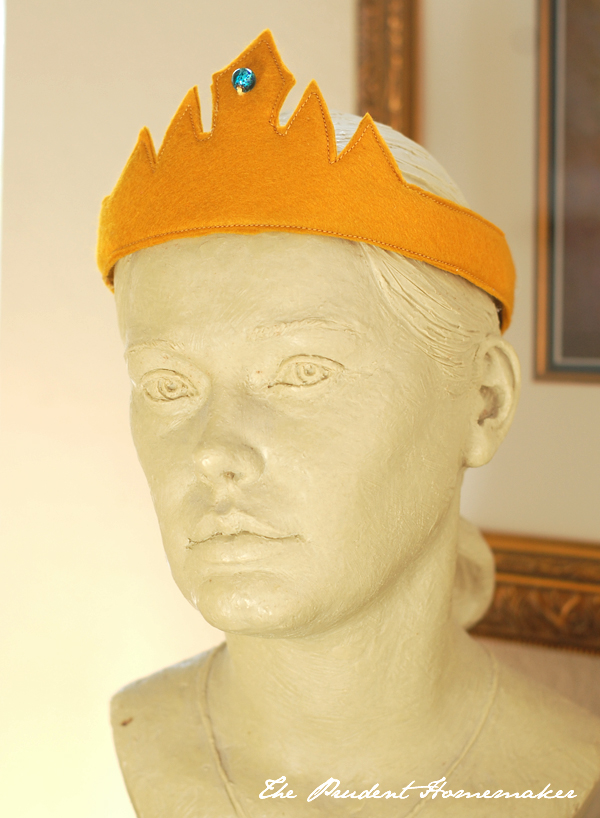
Elsa actually asked for an Elsa crown, so I went looking for a template for one. While I found several, this one was the best suited to be stiff enough to stand up in fabric.
Supplies:
1/8 yard of felt
less than 1/8 yard of pellon (the super-stiff, non-fusible kind)
1-inch wide elastic (2 pieces each 1 1/2 inches long)
Beads or buttons to decorate (optional)
thread
Tools:
Scissors
Iron and Ironing board
Sewing machine
hand-sewing needle
Measuring tape
Sewing pins
I measured both girls’ heads so that I had a total length for each. I cut the final headbands an inch and a half shorter than their head measurements.
Use the Elsa crown pattern, adding a long amount on to each side to make it go around the head.
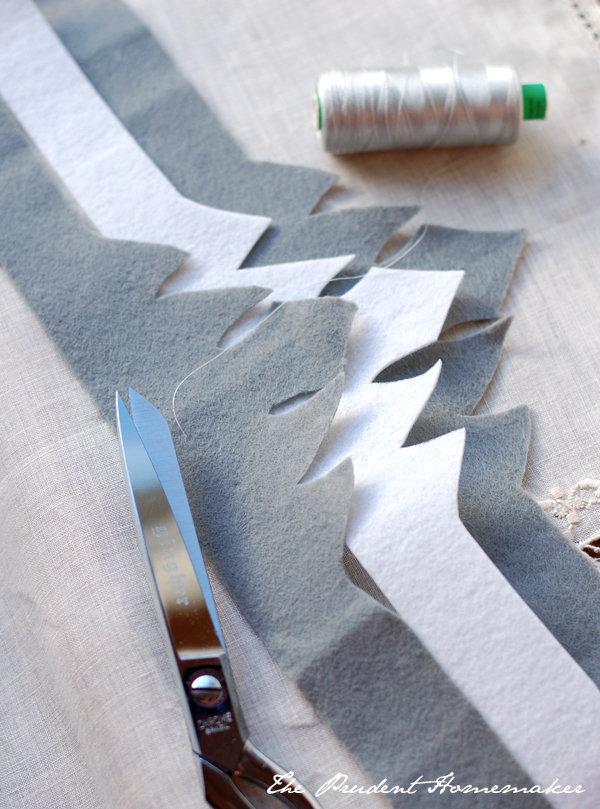
Cut two pieces from felt, and one piece from Pellon.
Trim 3/16″ inch off the pellon piece, all the way around. This helps to keep it inside the seam line.
Layer the crown pieces like a sandwich, with the pellon in the middle. Pin the pieces together and stitch all the way around using a 1/8 inch (2 mm) seam, leaving the ends open (the ends that meet in the back).
Insert the piece of elastic into one end of the crown and sew it in place. I sewed it in two parallel seams to make sure it stays put. Repeat for the other side.
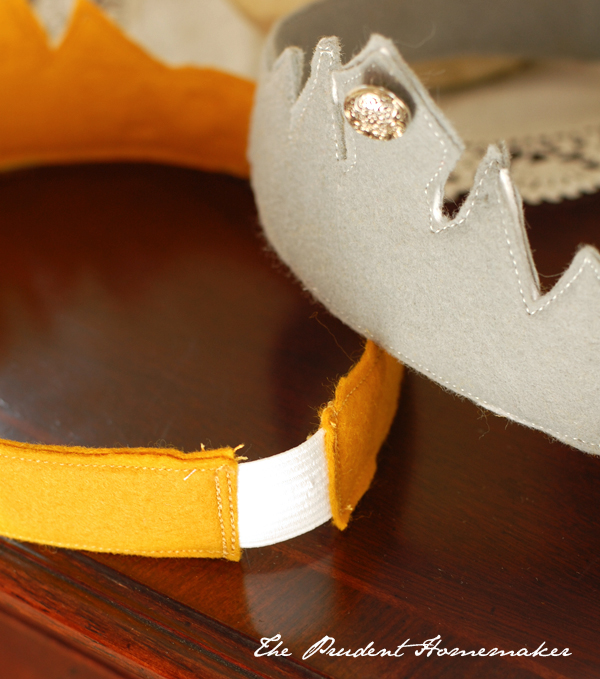
If you want a button or a bead, sew it on by hand afterwards. I only went through the top layer of felt when sewing it on.
Time:
It took me a few hours to get these done, but I had a lot of interruptions! Uninterrupted, I think you could make one in 30 to 45 minutes.
Cost:
$0.40 each.
The felt was a hand-me-down from a woman’s sewing stash, given to me by her daugher after she had passed away. The grey felt is synthetic; the gold felt is wool felt. Your cost will depend on the type and source of felt.
The button and bead were from my button jar and bead box. I only had one of each, which made them perfect for this project.
I purchased the Pellon at Joann’s with a 40% off coupon over a year ago. You just need a small amount for this project.
I bought the elastic in a large roll from Wawak.
What did you make today?

I sewed a Wonder Oven or Wonder bag as some call it. It turned out beautiful but it did not work so well. Made a big pot of chili, got it boiling and let the Wonder bag do the rest. By the time we got home it was not fully cooked or hot. I did use packing peanuts that I had for free. Some say they could be used instead of the tiny beads. Not sure if the peanuts were the problem or the idea itself. I may redo it and buy the beads but I could only find a huge bag for stuffing a beanbag and it was $20.00. Not sure if I want to reinvest the time and money. Anyone have any luck making one, or tips —thanks
The crowns are so adorable, Brandy. What a great gift for your young girls!
The statute looks royal! 😉
Your precious daughters are going to love the crowns. Again you are so creative! Wonderful ideas and great finds for patterns on the internet.
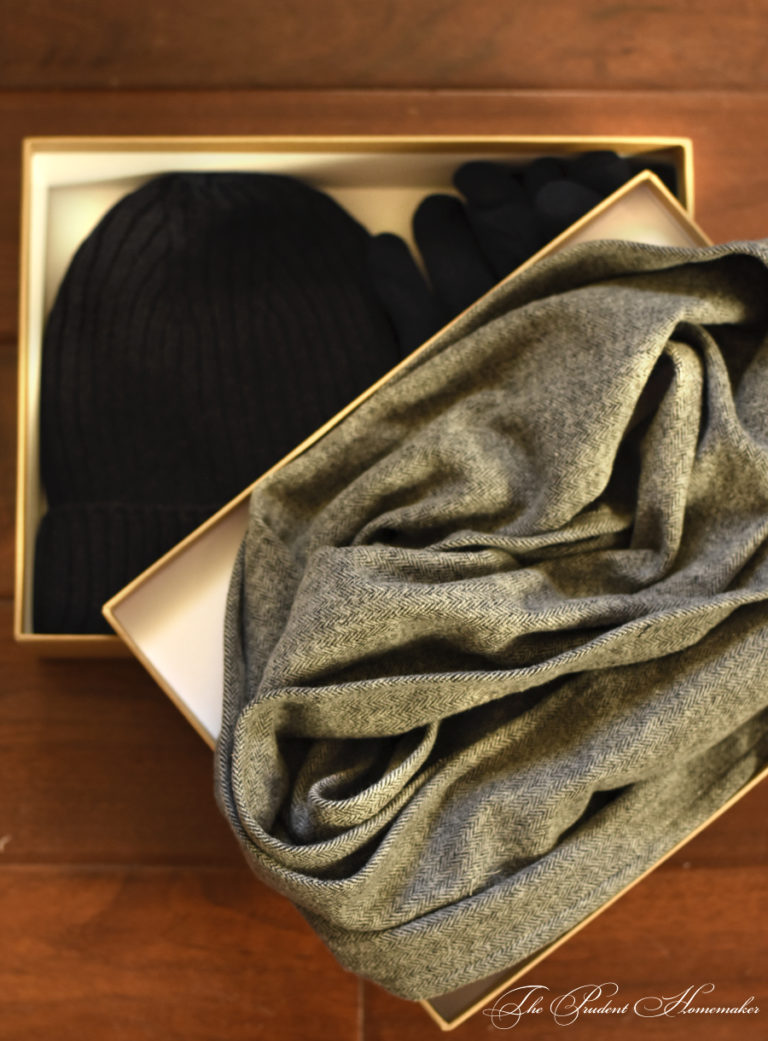
I made a couple of Christmas scarves for my daughters.
Very nice, any girl would love them. I think you could make one super SPECIAL is a bit of sparkle spray paint.
I made something similar for my dress up box. (I do home child care) I made the crown, painted it GOLD and used a piece of old lace curtain to make the vale in the back. It was a huge hit with the girls.
Love the crowns but they look like they could use more jewels , beads.
You can make them any way you want to. For the gold crown, I was copying the look of Elsa’s crown from Frozen, and that one is gold with a single blue jewel. You could glue on a ton of jewels, or sew on several pearl beads. You could even make each side a different color to make it reversible. It’s however you want it to be.
I love the crowns! My husband bought me an ornate tiara when he was in New Orleans for business. I wear that while I’m in my craft room so I can be Queen Crafty. I can’t tell you how many times I’ve answered the door in that, forgetting I have it on!!
Debby
Your comment made my day! 😀
For a simple, quicker, not nearly as long-lasting crown, another idea is to cut a flat crown shape out of thin cardboard (like the type cereal comes in), cut felt out of cardboard, glue the felt and any embellishments on to cardboard, and then sew elastic (I used the elastic from an old pair of my daughter’s leggings) on the back. The back is butt-ugly but if you’re in a hurry it’s a very easy way to make a crown for a party or Halloween, without sewing or pellon.
My daughter was Wonder Woman for Halloween. She cut her crown from foam and glued it to a cheap, thin, plastic headband and wore it at the forehead. Turned out really cute. Later I saw a crown online for $30. Made me feel so pound of my penny pinching baby.
Brandy, the crowns are adorable… Know the girls will be thrilled with them.. Do you have a hiding place to put the things you are making?
When my two were young, I had my hiding places.. Now that my two are grown, they tell me, how they knew my hiding places and sneaked and peeked.. I never knew…:)
Love the crowns! We all need one. By the way, I don’t know if you are aware that the Amazon ad obstructs the view of the ingredients list on your recipes. You are probably already working on that. I made your Squash soup last week by the way and gave you a big thumbs up on my blog. Loved it! And love the new website!
Linda, I only see the Amazon ad in the left sidebar, as it should be. It doesn’t cover over anything. What device are you using to view my website?
Brandy, I like these crowns so much! What I especially like about them is how comfortable they will be to wear compared to a plastic version. Nice job!
Made my day too! LOL What an excellent gift from your husband!
The website looks different on every device/browser I use. Sometimes, it renders beautifully and sometimes it gets messed up…refreshing/reloading usually works. Cross-browser compatibility is one of the biggest challenges of web design…especially now with all the mobile options!
The crowns are lovely! I love wool felt; it stands up so much better than the synthetic type.
We figured out the issue and I’m resolving it. Thanks for letting me know!
Lovely crowns, simple enough for different fantasy games.
Btw, have you thought of making clip earrings?
Your comment brought back fond memories. My brother and I could never find my parents hiding spot, despite searching extensively. As adults we finally asked them where they hid our gifts. They told us they used to put them in our camping trailer, which was always locked up and sat in the back yard during winter. We never even thought to look there!